HackTown
Cyber Criminal University - Home

You are not logged in. You will only be able to access the courses in GREEN from the course list.
Chapter 6 - Whonix, Tails, & Kali
 Before you go on implementing anything learned in this chapter it's best to read through it entirely first and get a feel for the material.
It's most important to read the final paragraphs in this chapter to have an understanding of which method you want to implement into your daily setup as there are benefits to using Virtual Machines as well as booting from a USB, microSD, etc.
Lastly, when using Linux it's good practice to clear the sudo cache when using sudo at the Terminal by using "sudo -k" before the command. This is good because when you just run "sudo" your UID is still able to login for the next 5 minutes after you have successfully authenticated. So if your door gets karate kicked in by the feds if you've cleared your bash history and are using "sudo -k" you're not root in your evil server at that moment.
In this chapter we're going to install multiple different Virtual Machines (VMs). We'll install Windows, Ubuntu, Kali, Whonix, and even Tails.
You should have VirtualBox and VMWare installed so let's discuss the first way of operating online anonymously which is using your main computer to run Whonix inside a VM.
If you haven't heard of Whonix or Tails then this will be your first introduction to them. Basically, they're both designed to automatically protect your identity and ensure everything is routed through Tor without you having to set it all up. In a nut shell, any retard should be able to fire them up and not fuck anything up whereas experts would do this manually so everything is already done for you. Plug and play.
Whonix VM
https://www.whonix.org
"Whonix is a desktop operating system designed for advanced security and privacy. Whonix mitigates the threat of common attack vectors while maintaining usability. Online anonymity is realized via fail-safe, automatic, and desktop-wide use of the Tor network. A heavily reconfigured Debian base is run inside multiple virtual machines, providing a substantial layer of protection from malware and IP address leaks. Commonly used applications are pre-installed and safely pre-configured for immediate use. The user is not jeopardized by installing additional applications or personalizing the desktop. Whonix is under active development and is the only operating system designed to be run inside a VM and paired with Tor."
Whonix routes everything through Tor (like Tails) using a Whonix-Gateway VM and a Whonix-Workstation VM to do so. All data is transferred only from the Whonix-Workstation to the Whonix-Gateway and from there everything is routed through Tor.
There is two ways to start Whonix either operating "Live" or "Persistence". The "Live" version will wipe everything after a restart kind of like Tails OS. We want the "Persistence" version so we can save our items, passwords, etc. and operate normally using the OS. If you wanted to use it as a throw away then the "Live" version would be best. Try both to see exactly what is what before committing one way or the other.
I highly recommend once you've installed the Whonix VMs to then move them onto an encrypted USB and launch them from the USB moving forward. Avoid writing anything to the HD as much as possible if you can.
Whonix is very easy to setup!
Head over to:
https://www.whonix.org/wiki/VirtualBox
Click on "Download Whonix LXQt (VirtualBox) (stable) (FREE!)" to download the Whonix VirtualBox files.

Once you've downloaded the Whonix OS double click the Whonix-LXQt-X.X.X.Intel_AMD64.ova file and it will automatically load Whonix into VirtualBox for you. It might take a few minutes importing Whonix OS into VirtualBox.
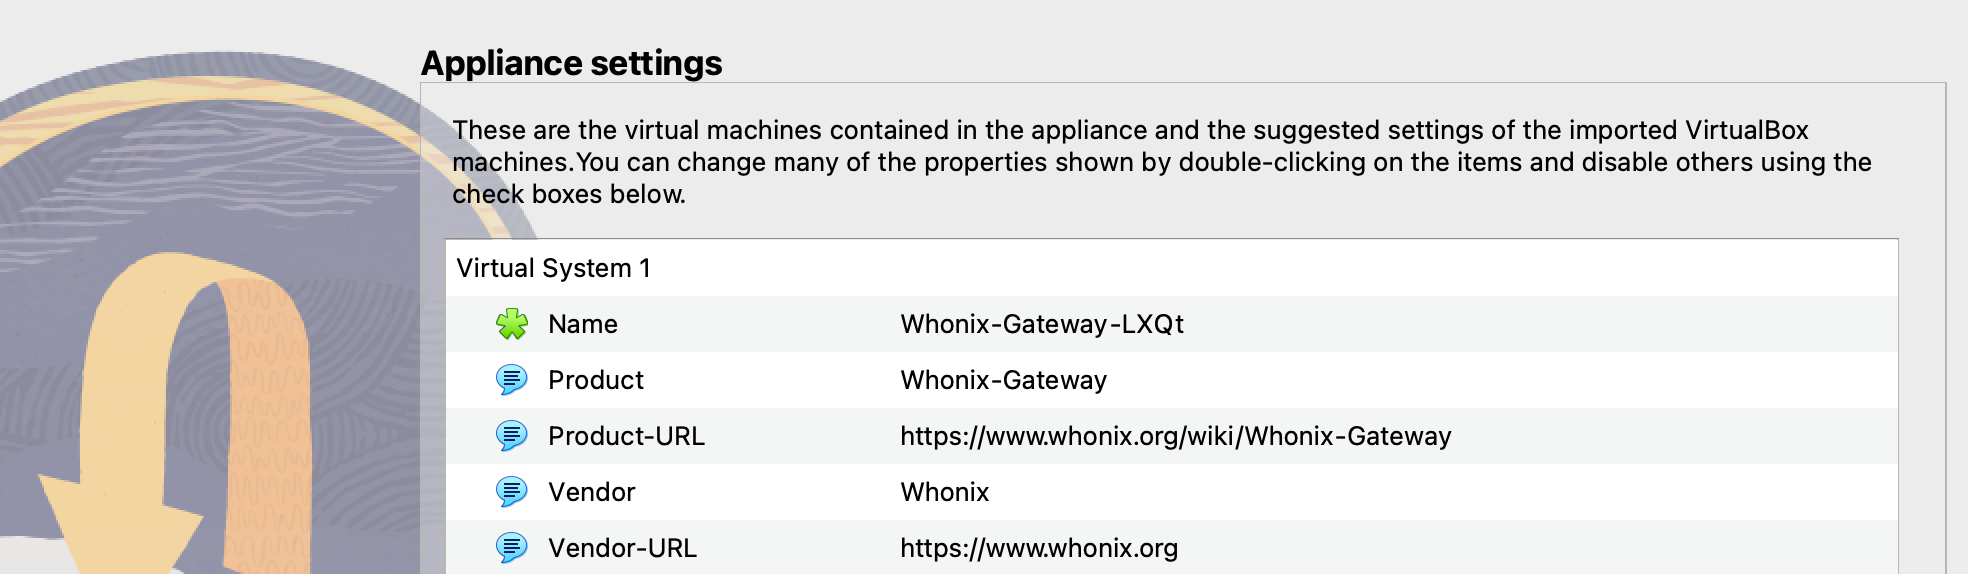
Whonix functions as a Gateway and a Workstation. The Gateway acts a medium between your Whonix-Workstation and Tor whereas the Workstation is what you would use as your daily OS.
There are (2) Whonix VM's to select from after you've imported the VirtualBox .ova file. You always want to launch the Whonix-Gateway-LXQt VM first, wait until that boots up and is complete, and then launch the Whonix-Workstation-LXQt VM after.
All your activities will be done through the Whonix-Workstation-LXQt VM while nothing is done in the Whonix-Gateway-LXQt VM. The only time you'll be doing anything in the Whonix-Gateway VM is installing updates as needed.
Ok let's start Whonix up.
Select the Whonix-Gatway-LXQt and click on "Start".

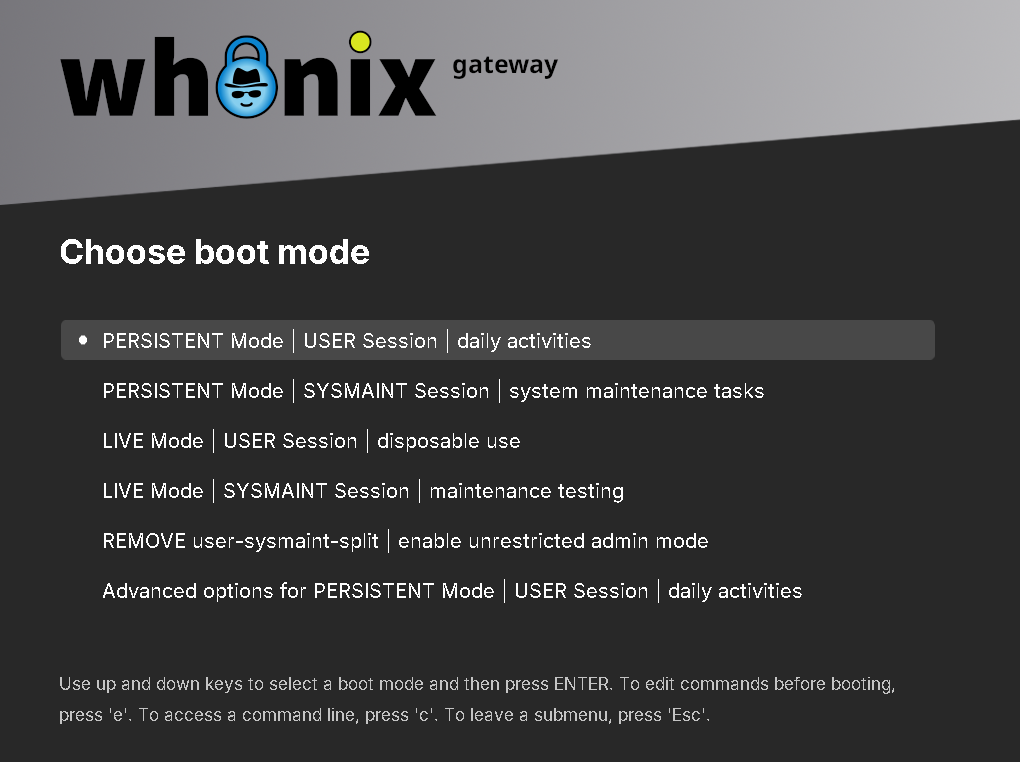
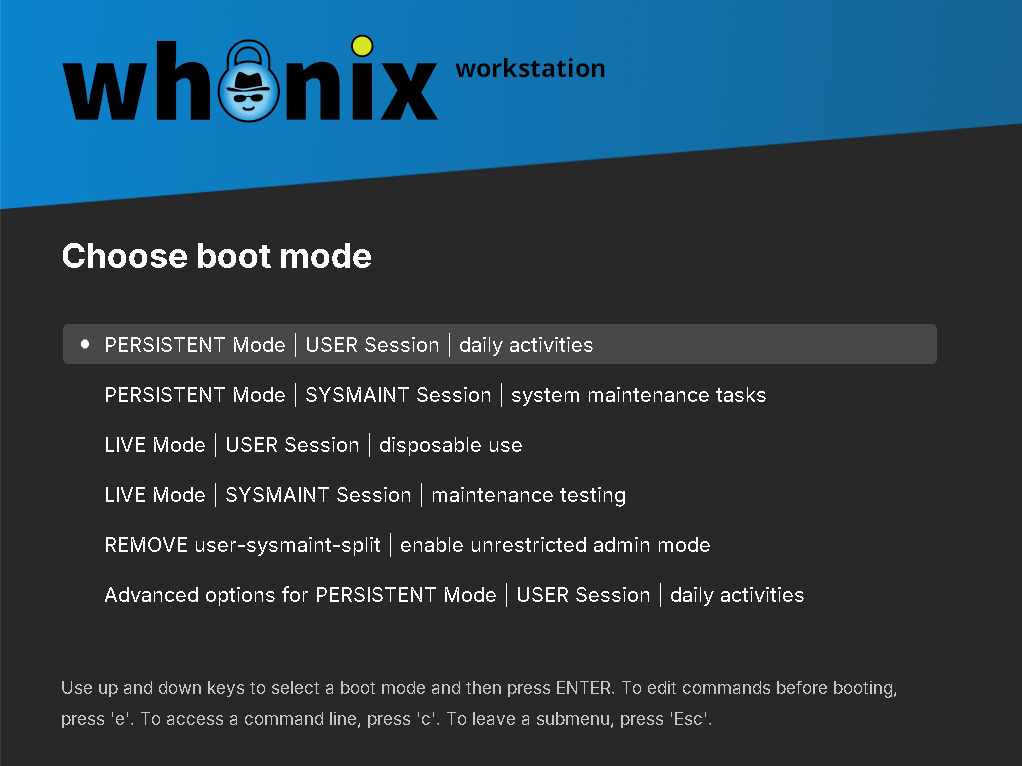
You will have a few seconds to make a selection when you're presented the screen below when you start the Whonix-Gateway-LXQt VM. First, you want to update the OS so when you see the screen below select "PERSISTENT Mode | SYSMAINT Session | system maintenance tasks" and hit ENTER on your keyboard.

Once the Whonix-Gateway-LXQt VM boots up you will be presented the window below. Let's first click on "Check for Updates". When that has finished you will see a NOTICE telling you that you can close the window.

Once you have closed the window click on "Install Updates" where another window will pop up. Once completed you will see a NOTICE telling you that you can close the window.

Next we want to create a password for "user" and disable the autologin function. Click on "Manage Passwords" and enter "user". Change the user password to whatever you like and once that's done you will be notified that you can close the window.

Next, we want to disable the autologin function preventing others from automatically logging in to your Whonix VM. Click on "Manage GUI Autologin" and go through the prompts to disable the autologin for "user".

Ok now we can "Reboot" the Whonix VM so we can log in as "user". After the Whonix VM restarts select "PERSISTENT Mode | User Session | daily activities" where you will be prompted to enter your username and password.

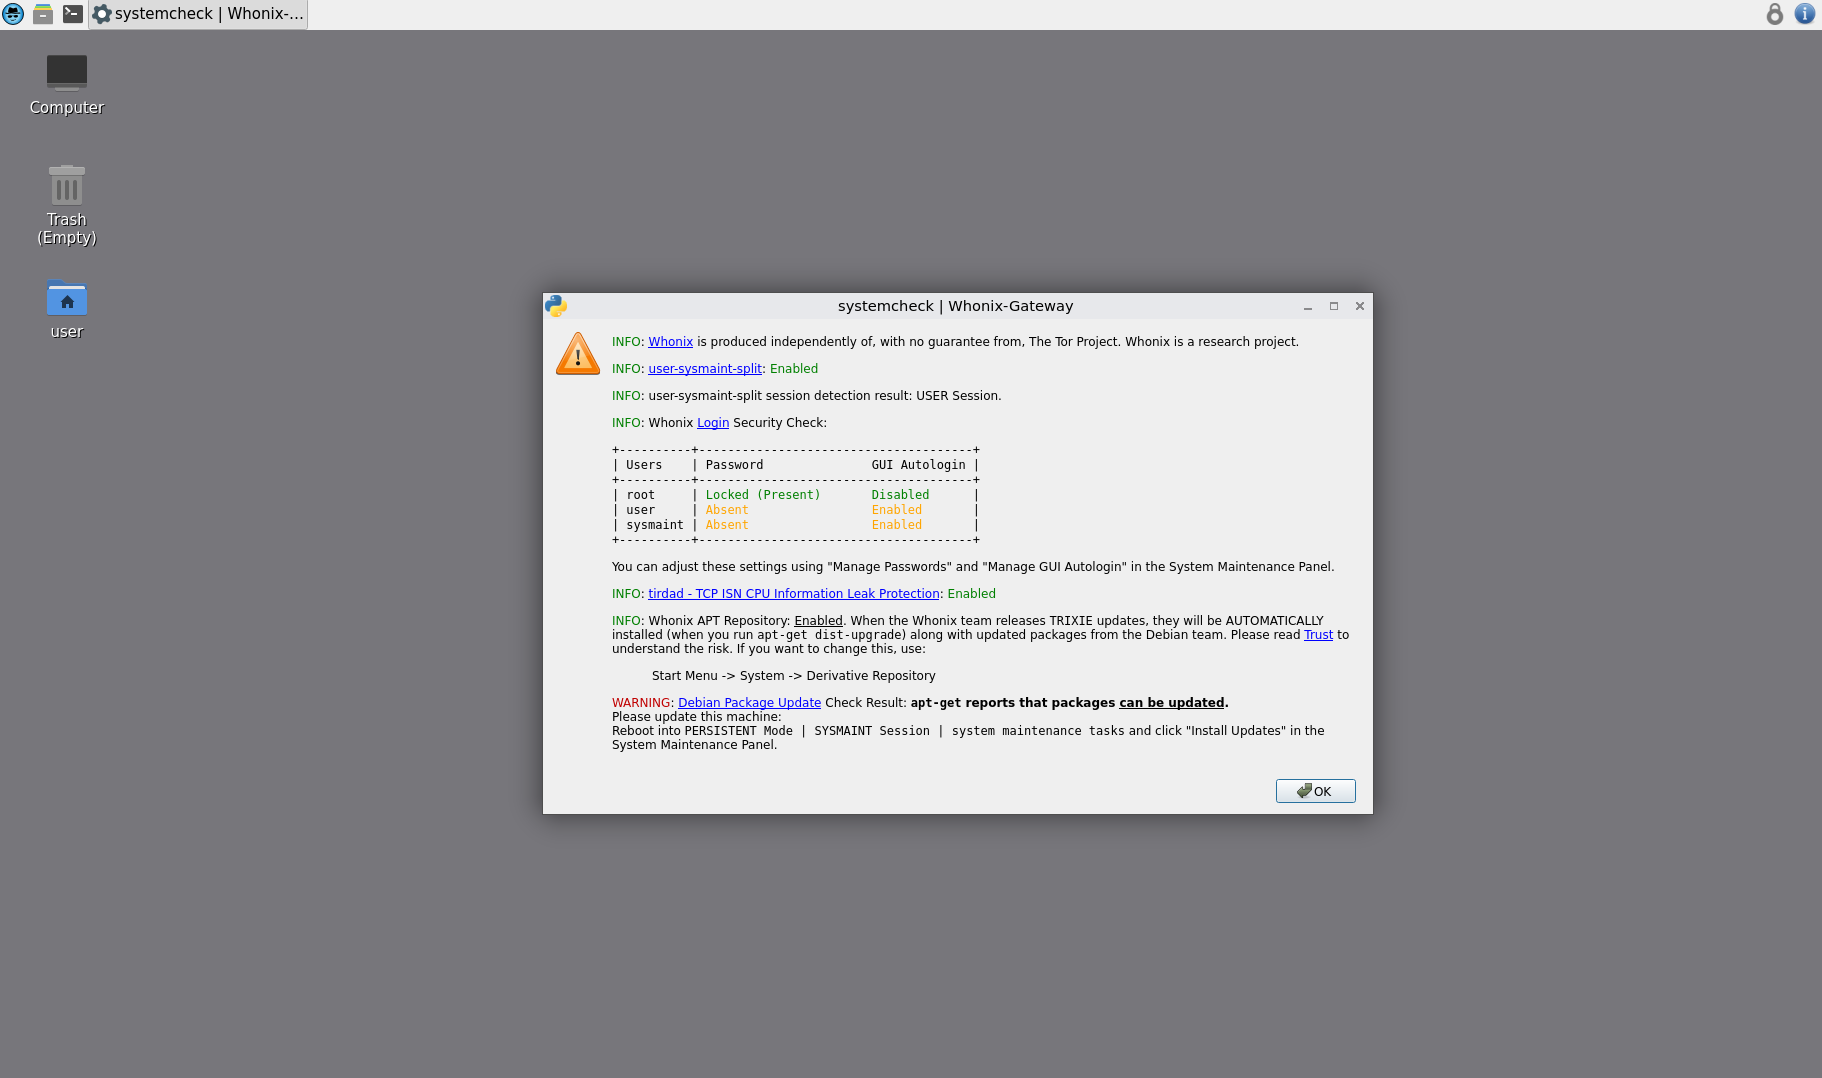
Once you're logged in let Whonix complete its "systemcheck" and once that's finished you can click "OK" to close the window.

Minimize the "Whonix-Gateway-LXQt" VM and leave it running in the background. Now go back to VirtualBox and Start the "Whonix-Workstation-LXQt" VM. All your activities will be done on the Whonix-Workstation-LXQt whereas the Whonix-Gateway-LXQt is used as a proxy and must be ran before having Tor connectivity in your Whonix-Workstation-LXQt.
Both VMs must be running, Gateway first and once that's up and running then launch the Workstation.
Once Whonix Workstation boots up select "PERSISTENT Mode | SYSMAINT Session | system maintenance tasks" so you can update everything and install the updates like you did when you were setting up the Whonix-Gateway-LXQt VM. Just like the Whonix-Gateway you also want to change the user password and disable autologin under "Manage Passwords" and "Manage GUI Autologin".
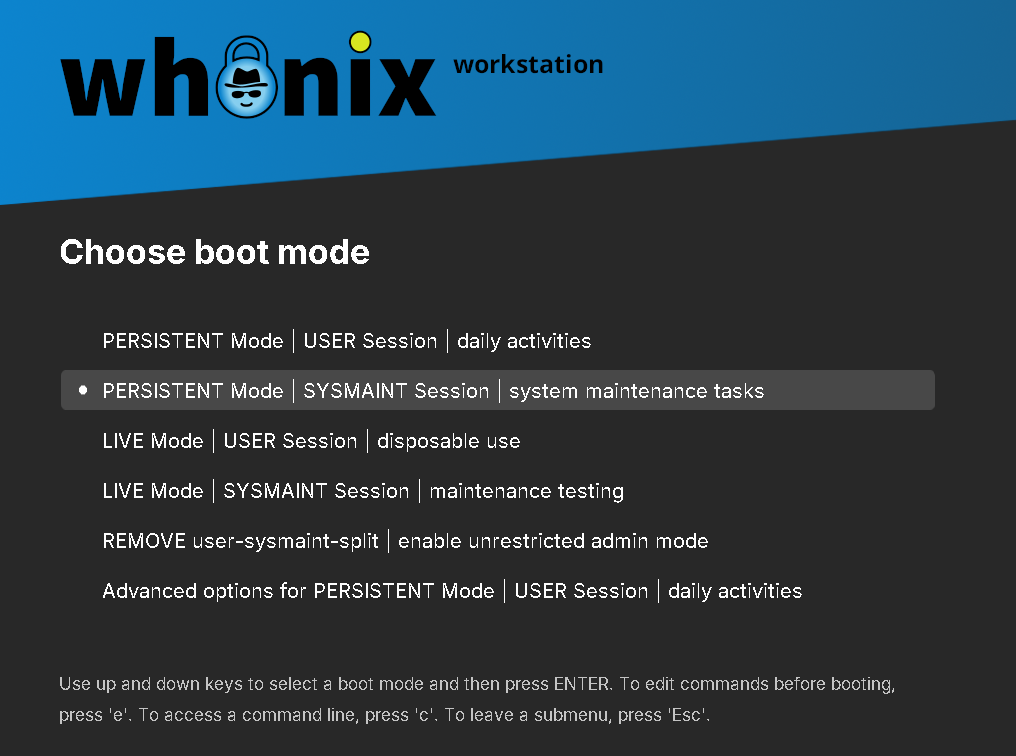
Once that is completed click on "Reboot" and then login using the "PERSISTENT Mode | User Session | daily activities".
Once you've started the Whonix-Workstation it will connect to Tor and then look like the screenshot below. The top left icon is where you can access all your applications (Tor Browser, Password manager, BTC wallet, etc.).

After that you're good to go! Your Whonix-Workstation is setup ensuring everything you're doing is routed through to the Whonix-Gateway proxy and then from there everything is routed through Tor. Think about the exploits needed to compromise and expose you when you're running this setup. In my opinion this is the safest method when it comes to anything dark web related if you insist on using Windows or macOS as your host OS on your computer. If you're running Windows or macOS make sure your host OS is hardened and locked down.
Doing all of your Dark Web dealings through a Whonix VM that is saved on an encrypted USB while making sure your host OS is hardened along with using everything else discussed in this course should be good enough for whatever you have planned.
I won't go into a full tutorial on Whonix because it's important you try it out for yourself and get a feel for the OS. I suggest familiarizing yourself with Whonix before fully committing to using it so make sure you create PGP test keys, emails, wallets, etc. to see how it functions and re-install it when you're ready to make the real switch over.
- Store all your files and VMs on an encrypted USB. Avoid writing to HD.
- Once you've installed your VMs move them to your encrypted USB.
- Use a VPN on your host OS.
- Use strong passphrases when setting up passwords for everything.
- Ensure you backup important files frequently (PGP keys, passwords, etc.).
The second way of operating is by using a USB to boot up Tails OS which runs only in memory and wipes everything upon shutdown. Having something run in memory simply means nothing is saved to your Hard Drive (HD). It leaves no trace after shutdown and only resides on a USB, SD card, microSD card, etc.
Tails OS
Tails is not really designed to preserve your anonymity online, we use Tor for that, and is mostly for securing your data and giving you protection against computer forensics.
Tails "must" be installed onto a USB. Once Tails is installed onto a USB you can use that to bootup into Tails directly into memory with nothing writing to your HD. If you install Tails in a VM then you're not given the option to setup persistence which means you can't save anything after each reboot which is useless. Ok now that being said you can run Tails in a VM but you will not have persistence and would be required to relaunch the VM fresh everytime. There are downsides to doing so and Tails developers caution against this. However, most of the down sides in my opinion are due to the fact that if you're computer is compromised with a keylogger or similar malware it could capture all your keystrokes revealing XYZ. Whereas if you boot directly into Tails from a USB you wouldn't half to worry so much about that. Depending on where your comfort level sits and whether or not your capable of hardening down your Windows or macOS computer will dictate which way you go.
If the Tails OS is secure enough to run as an OS then it should be safe just as the same in the VM. Of course keeping your host machine up to date, secure, and hardened is what you should be familiar with doing. As you progress throughout your hacking mania career you'll be trying many things out figuring out what works for you and what doesn't.
For everyone at the beginner level it's best to boot into Tails from a USB to avoid problems. We're going to assume moving forward that you're booting into Tails from a USB.
Installing Tails onto a USB is a must for any beginner so you can install a persistence folder on the USB to keep your bookmarks, passwords, PGP keys, email accounts, etc. saved after each reboot. Setting up an encrypted persistence folder in Tails booting from a USB is required to operate online properly.
You will need a 8GB USB minimum to install and use Tails properly. I recommend getting a USB with a very high data transfer rate 150 Mbps+ so Tails runs as fast as possible. Since everything is in memory and booting from your USB you don't need a good computer to run Tails.
Once you have your USB ready head over to Tails and download the USB image file.
https://tails.net/install/download/index.en.html
Download Etcher to install a ISO/IMG onto a USB as a standalone OS.
https://etcher.balena.io
Once Etcher is installed plug in your USB and click on "Select image", select the Tails file, and click "Flash".
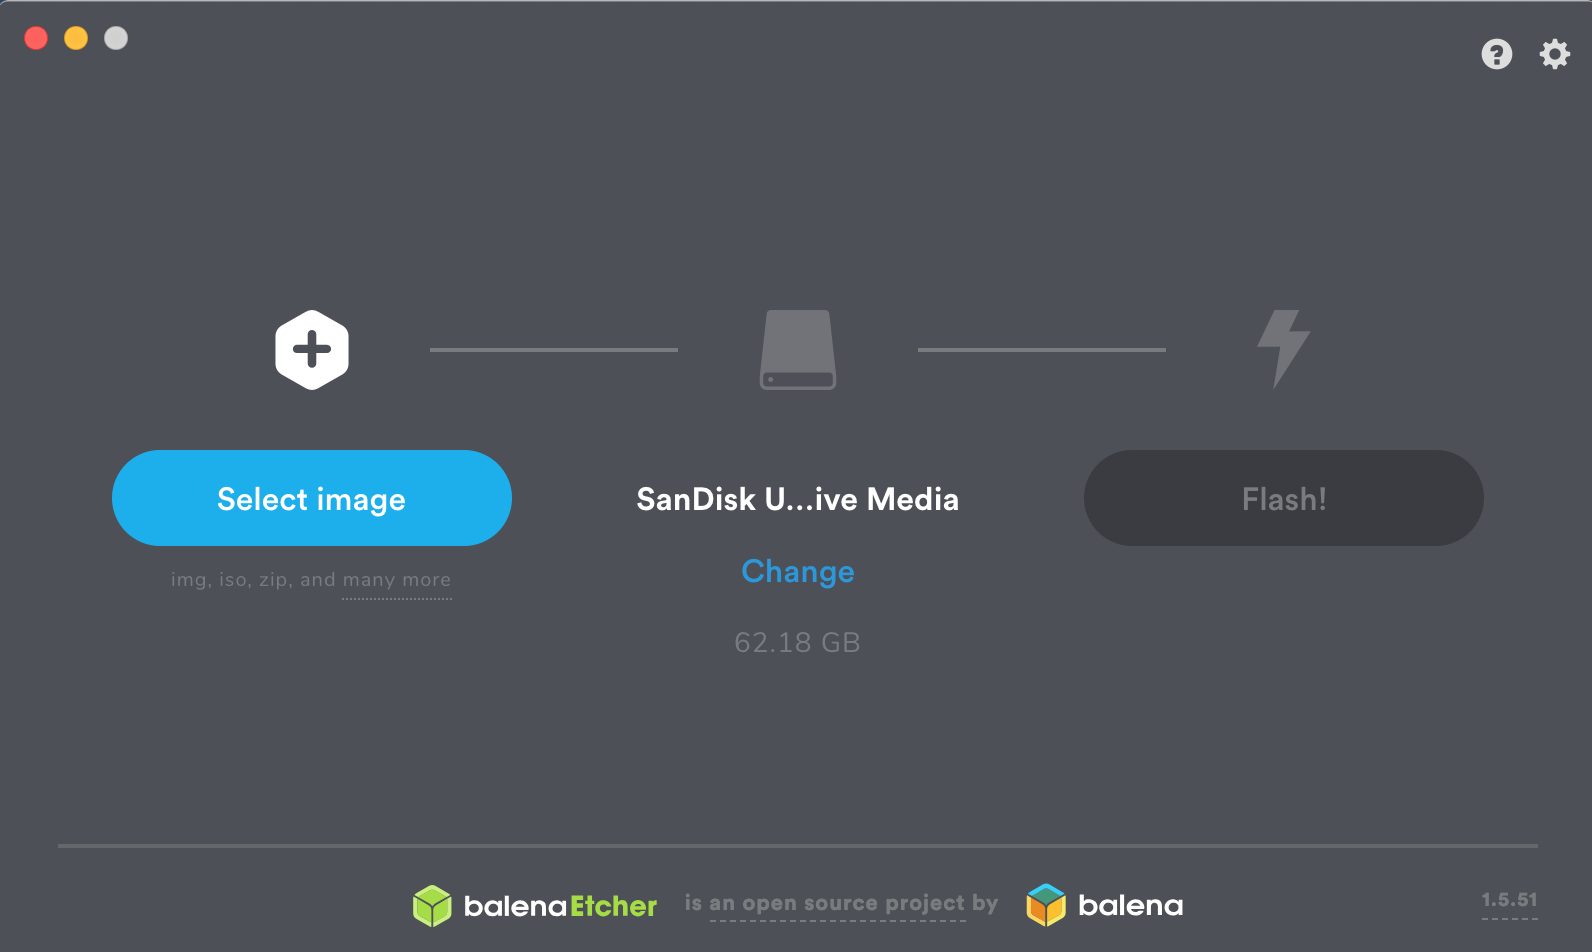
If you want to install any other OS (Kali, Ubuntu, etc.) onto USB then just download the ISO and use Etcher to install it onto USB. Easy shit brothers and sisters.
Once installed onto a USB you need to go into your BIOS settings and tell your computer to boot from the USB before booting up your normal host OS. Each OS is slightly different on how to access your BIOS settings and to enable booting from USB.
Now you know how to boot into Tails OS from USB.
Once Tails boots up for the first time you will see the window in the screenshot below. Click on "Start Tails" if you want to run Tails without any way of saving shit or realistically operating in the wild. For the rest of us, we need to have our stuff on the computer after every reboot or how the fuck are we supposed to operate so read on.
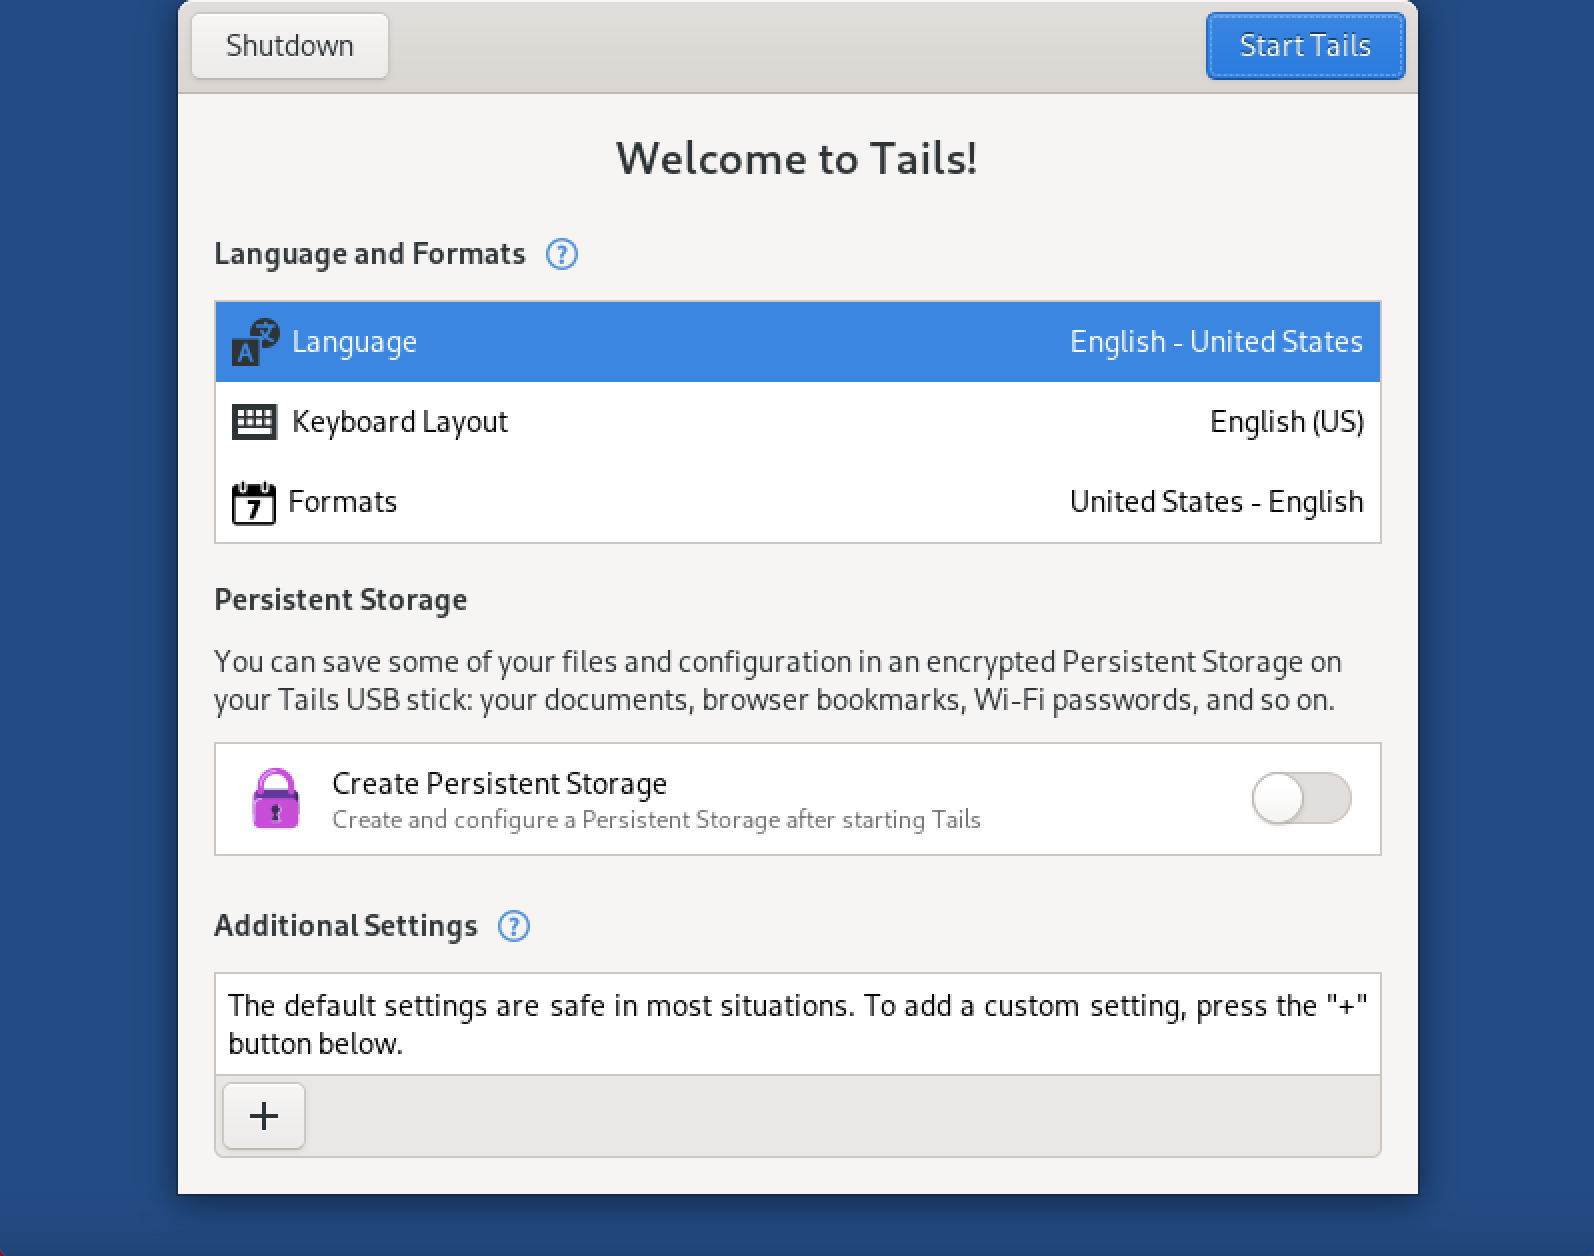
First things first we need to setup your persistence encrypted folder so all your items are there after every reboot. Make sure that "Create Persistent Storage" is turned on and click on "Start Tails".
Follow the prompts to set up a passphrase then click on "Create Persistent Storage" where you will be presented items for you to decide if you want to make be saved in Tails after each reboot. Make sure "Persistent Folder" is on so you can store all your files and everything there. In general it's good to have a Bitcoin Wallet, at minimum, and as time goes on by you will add more persistent items but for our learning purpose we just want a Persistent Folder set up. Click on the "x and you'll be at the Tails Desktop.
Alright, you now have persistence set up in Tails so you can keep all your dick pics secured and encrypted within Tails. That's great!
Now that's done restart Tails again to be greeted with the screen below with a new option to enter a password for an "Encrypted Persistent Storage".
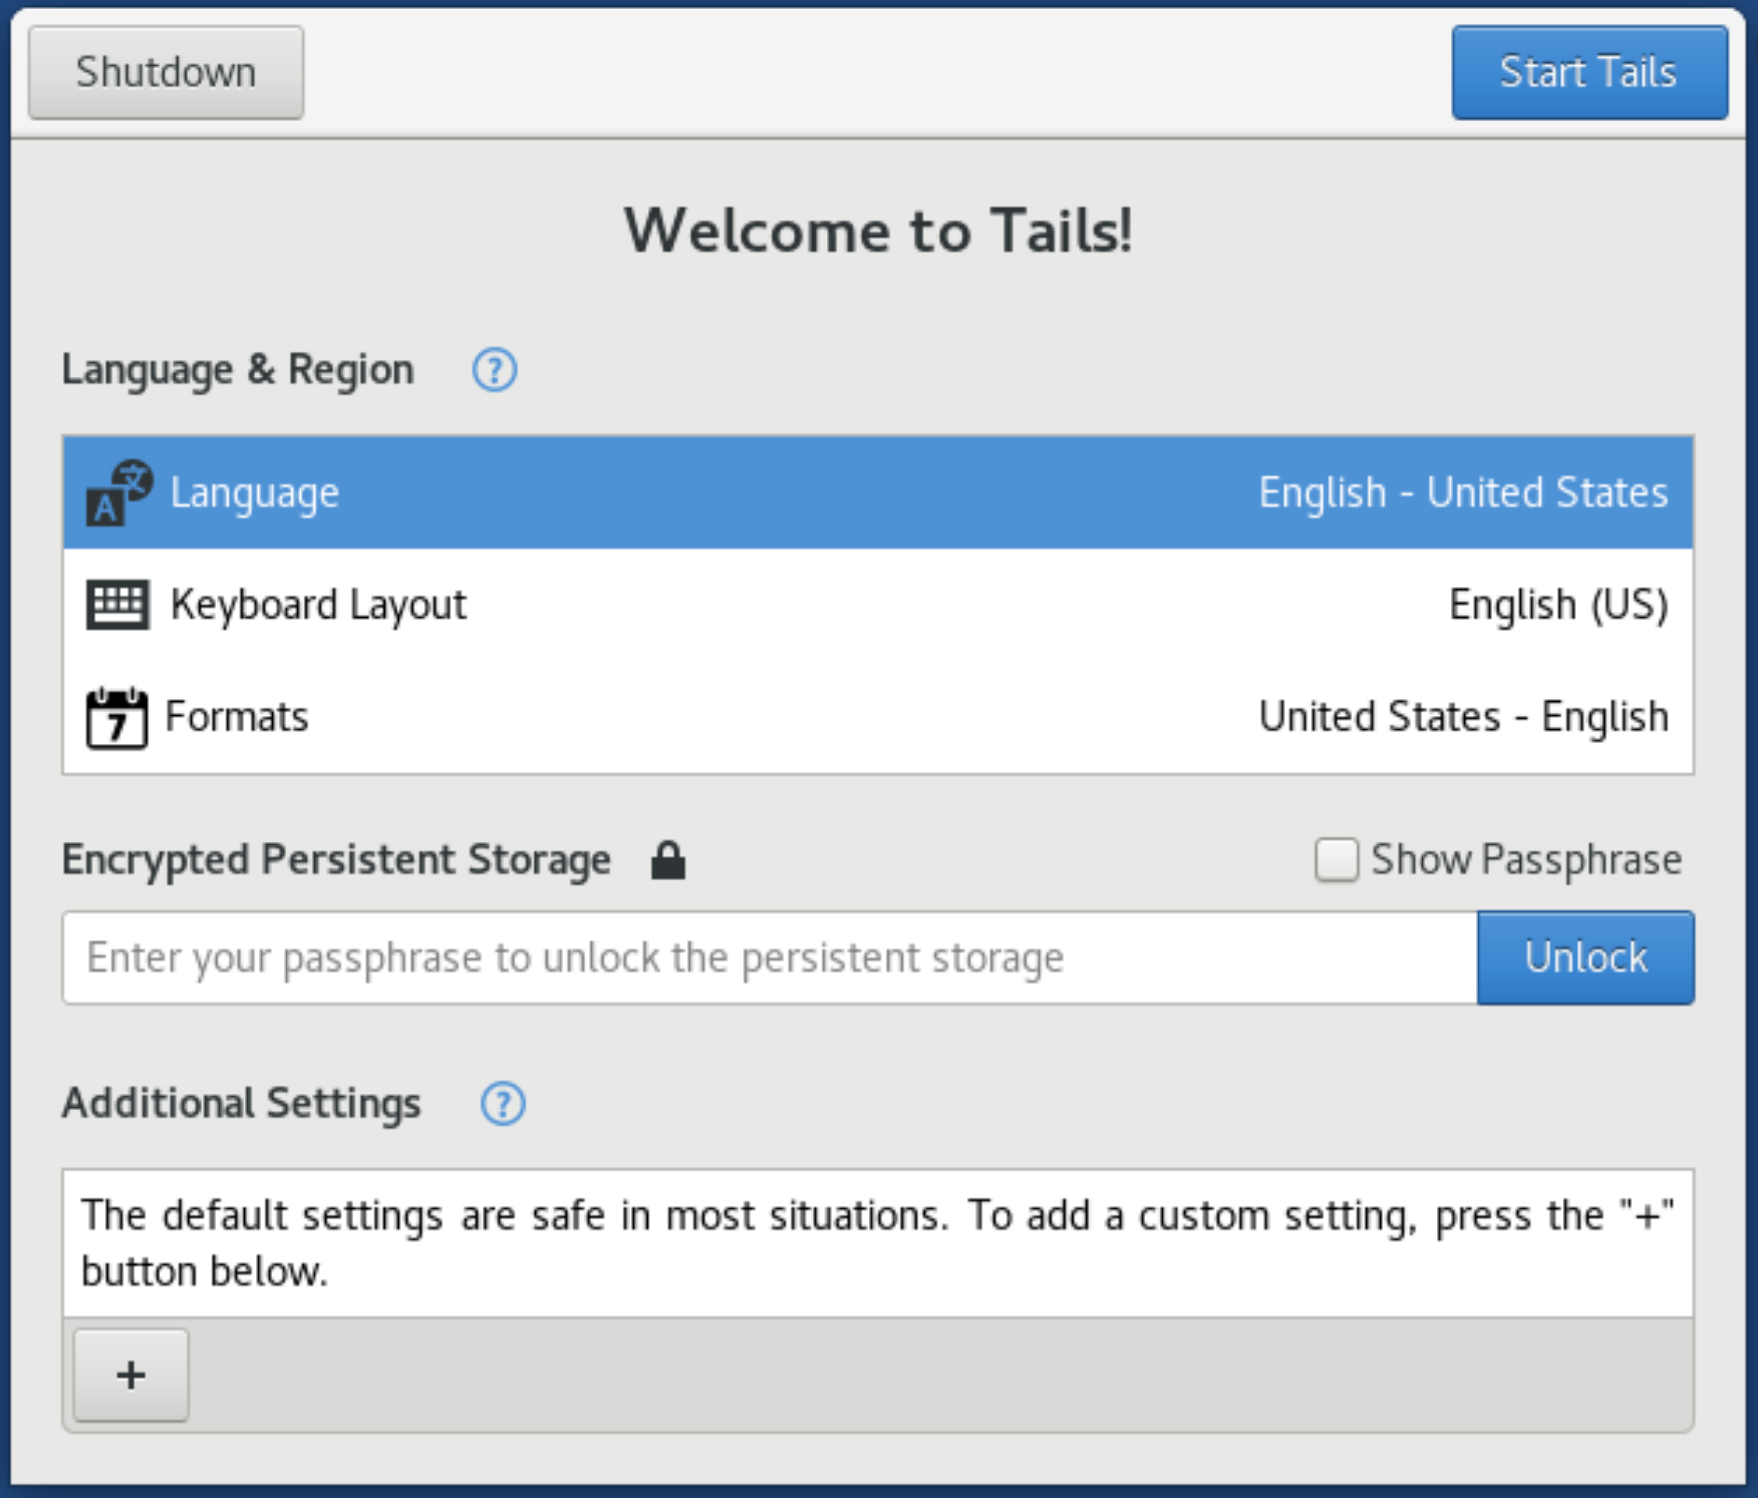
Enter your password to decrypt your persistent folder and away you go!
To access your files click on "Apps" and then select the "Accessories" then "Files" to navigate into your "Persistent" folder. Anything saved to this folder will always be there after each bootup of Tails.
Once you've started up Tails and connect to a Wi-Fi network you will be prompted on how to connect to Tor.
Selecting "Connect to Tor automatically" will work fine for most of us.

Keep in mind when you are connected to a Wi-Fi network that requires you to go through a Captive Portal (Startbucks, public Wi-Fi, etc.) in order for you to be bale to connect to the Internet you will need to launch the "Unsafe Browser" so you can access Wi-Fi portal webpage. If this is the case then you need to turn on the "Unsafe Browser" at the beginning before starting Tails as seen in the next few screenshots.
If your asking yourself right now:
"How the fuck do I transfer all my darknet shit over to Tails"
Read the fuck on!
Step 1:
Purchase a fresh USB, encrypt it with VeraCrypt, and transfer your shit over to it. Make sure you include your PGP keys, KeePass keys, Tor bookmarks, every and anything you want encrypted onto a USB. However you're operating right now move all your shady ass shit to a different USB encrypted with VeraCrypt so you can have those files on your Tails OS.
Step 2:
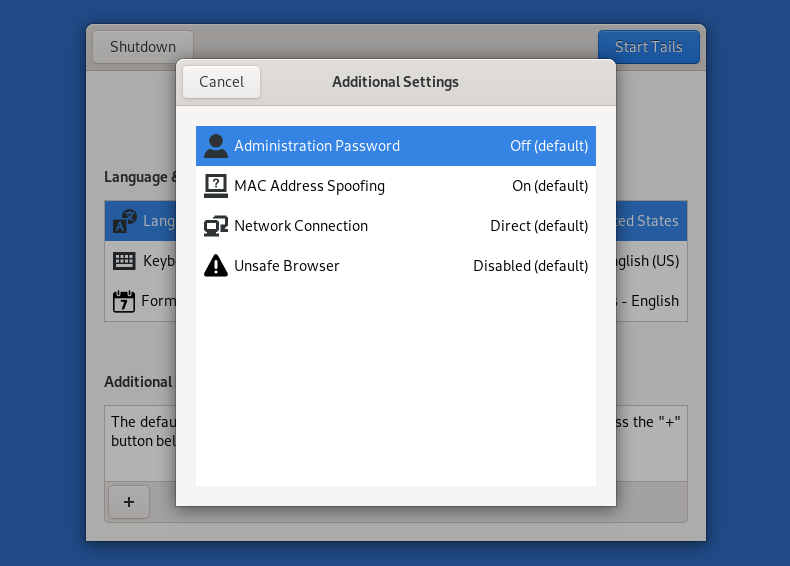
Plug your Tails USB into your laptop and boot that shit up. Don't forget to unlock your persistent encrypted folder and then click on the + below Additional Settings.

Turn on "Administration Password" and set an Admin password so you can transfer your files from USB to your persistent folder in Tails. Once that's done Start Tails.
Step 3:
Plug your USB with all your devious fucking sketchy ass plans on it into your laptop with Tails running.
If you're not automatically prompted to enter your password click on "Apps" in the top left-hand corner of your screen and then to "Utilities" and click on "Unlock VeraCrypt Volumes". Select your encrypted VeraCrypt USB and click "Unlock".
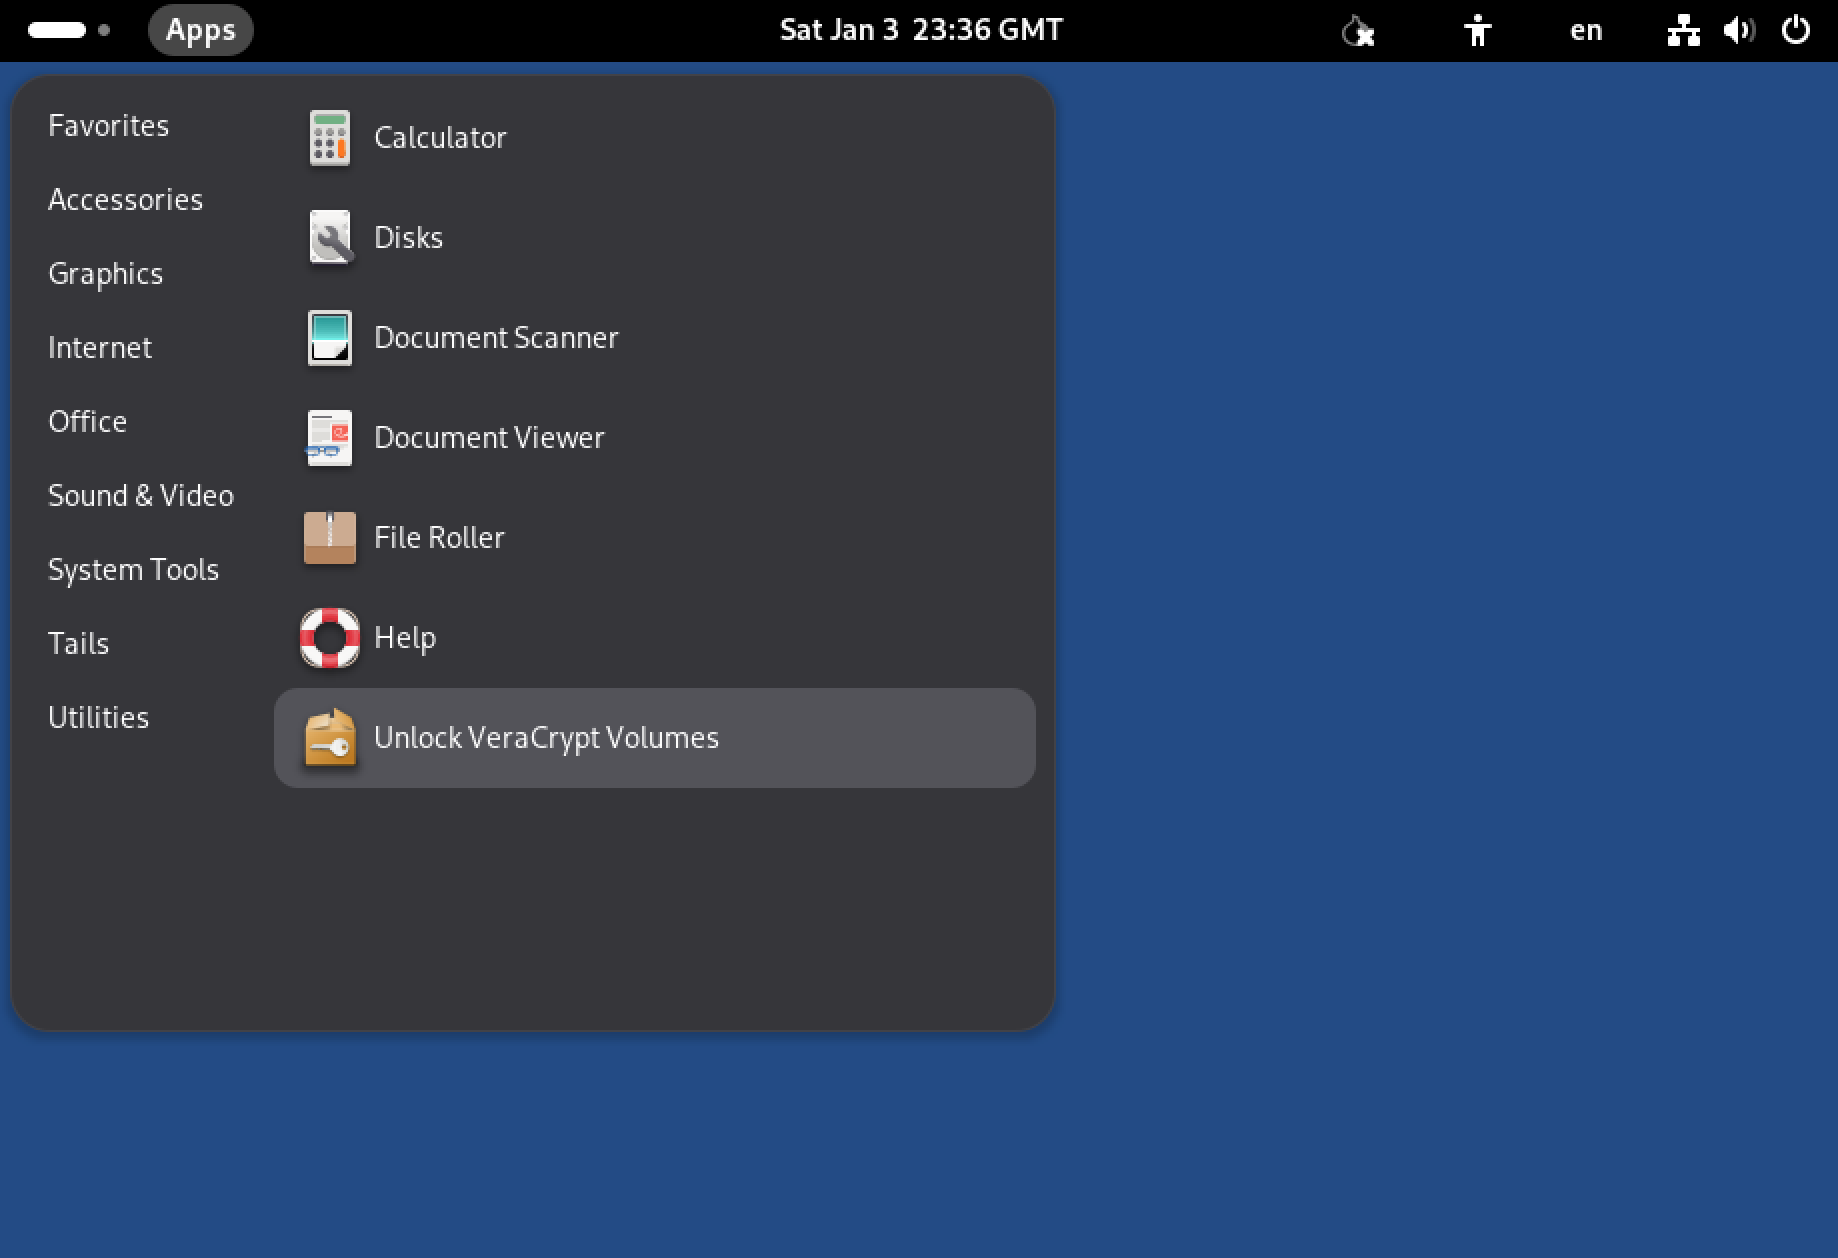
Copy/Move all your files from your encrypted USB to your encrypted persistent Tails folder. You can use that VeraCrypt encrypted USB as a backup should something ever occur to your files. The persistent folder is where you will store all your personal files needed for you to operate online.
Remember, it's better to first experiment with a new OS first before moving everything over, using Tails, and ensuring it's up to your liking before fully committing to it.
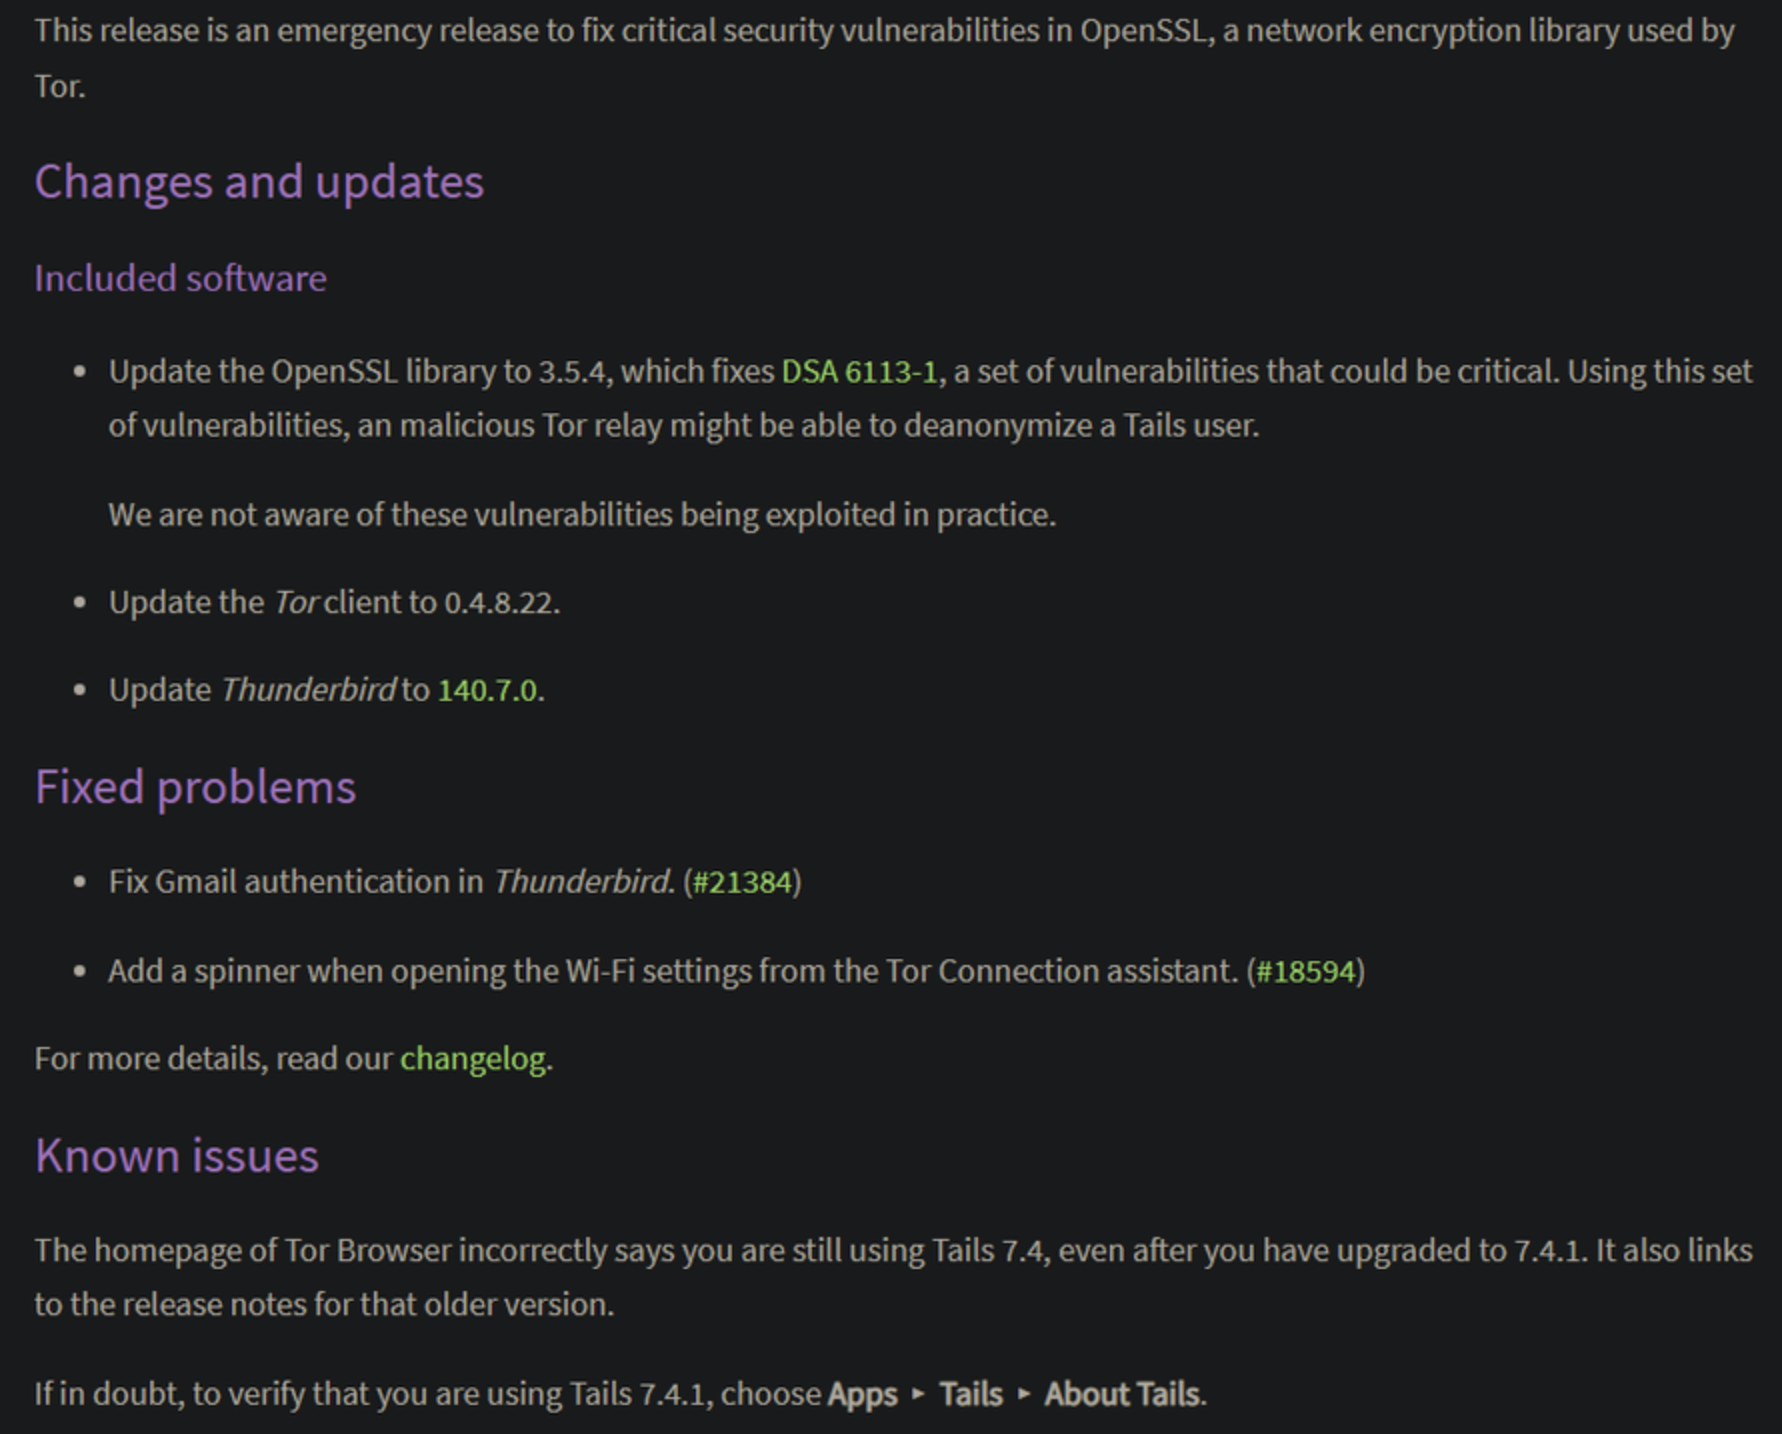
In 2026 Tails had a vulnerability that was quickly patch that could reveal your REAL IP. Don't naive think everything is going to work fine because there will be a day it will not. Just another reason not to use your own personal Wi-Fi network. How much more proof to you need!
As a cybercriminal, hacker pro fantastic, or online fraudster there are a few VMs you're going to want at your disposal specially when you're practicing your new found tradecraft. You're going to want to be using the latest Windows 11 or at minimum Windows 10. Windows 10 is now depretiated but not fully gone quite yet so we can assume some people you'll be targeting will still be using it.
Windows
Using Windows in a VM is ideal for us cybercriminal maniacs because you're going to want to test out the newest techniques, malware, and see how your attacks actually look to the people you're going to be targeting in the future. You want the newest OS updates plus many other things so you'll need a legitimate copy of Windows to actually see what is WHAT.
To do this, you'll ideally want to get a valid Windows Product Key and install Windows in a VM using an anonymous email with an anonymous Internet connection when you first update the Windows VM.
Microsoft is making it harder and harder to install Windows anonymously forcing users to sign up with a Microsoft account so it can be installed. However, there's a little trick to get around that, for now, by installing a local account that isn't linked to anything. You're still able to download and apply the latest updates without signing into an account but cannot use Microsoft related things (games, store, etc.).
If you get it working using VirtualBox please let me know cause I can't figure that shit out!
Download Windows 10 ISO
https://www.microsoft.com/en-us/software-download/windows10
Download Windows 11 ISO
https://www.microsoft.com/en-us/software-download/windows11
Fire up VMWare and install Windows 11 by using the .iso file you just downloaded. If it comes up for the firmware select "UEFI and UEFI Secure Boot". You might get asked for an encryption TPM password which you can enter yourself or have it generated for you. Either way you need to save that somewhere in case things go fucko on you. Before we launch the Windows VM for the first time put the network adaptor to Private and then start the VM
You'll get to a screen where it's asking you for a Windows Product Key. You can either follow the direction below this to obtain a valid key, which I recommend, or click on "I don't have a product key" and select Windows 11 Pro. It will go through the install prompts and once you get to the screen as seen in the screenshot below it won't let you continue because we don't have an Internet connection.

Once at the screen above we're going to hit Shift-F10 to open a command prompt window.
macOS users will have to hold function key then hold shift and then hit the F10 button.
After you have done Shift-F10 you'll be presented a Command Prompt window.
Enter the following and hit ENTER on your keyboard.
OOBE\BYPASSNRO
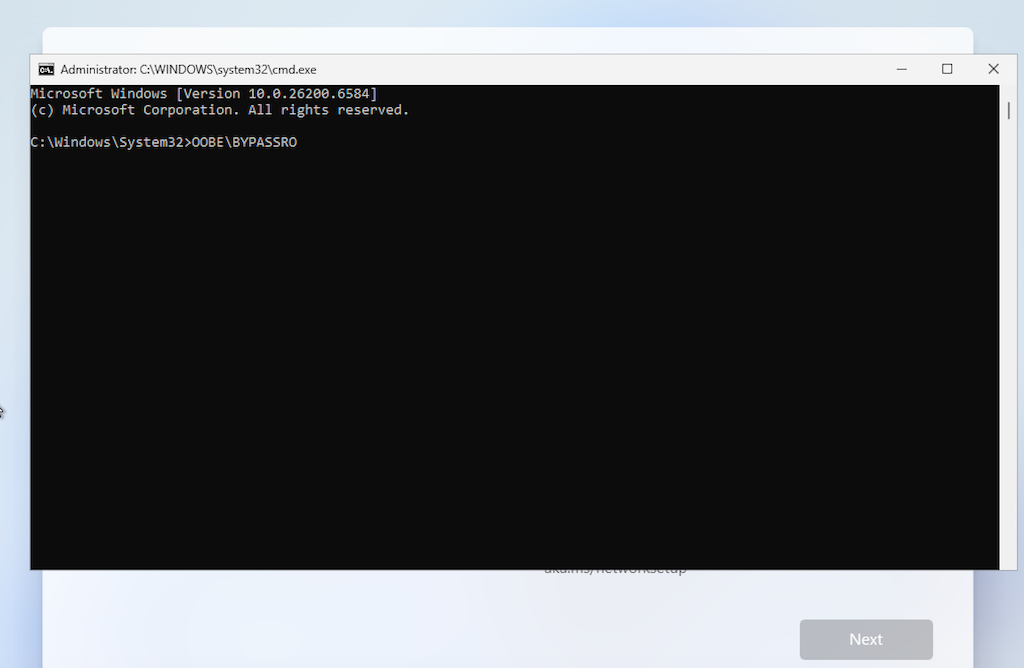
Windows will restart and go through the installation process again except this time when you get to the Internet Connection section there will be a "I don't have Internet" option available as seen in the screenshot below. Click on that to complete the installation.

Windows will go through the installation process and obviously unselect all the settings that you don't want. Remember to keep OPSec on point. Once you're done Windows will start up when it's ready.
The final step is to enable a network in the VM so we can update to the latest security fixes and ensure our Windows VM is updated. It's always good to keep your VMs up to date so you know that everything you're learning here at HackTown can be applied to the real world.
- Select "Virtual Machines" from the top VMWare menu and then click on "Install VMTools Tools".
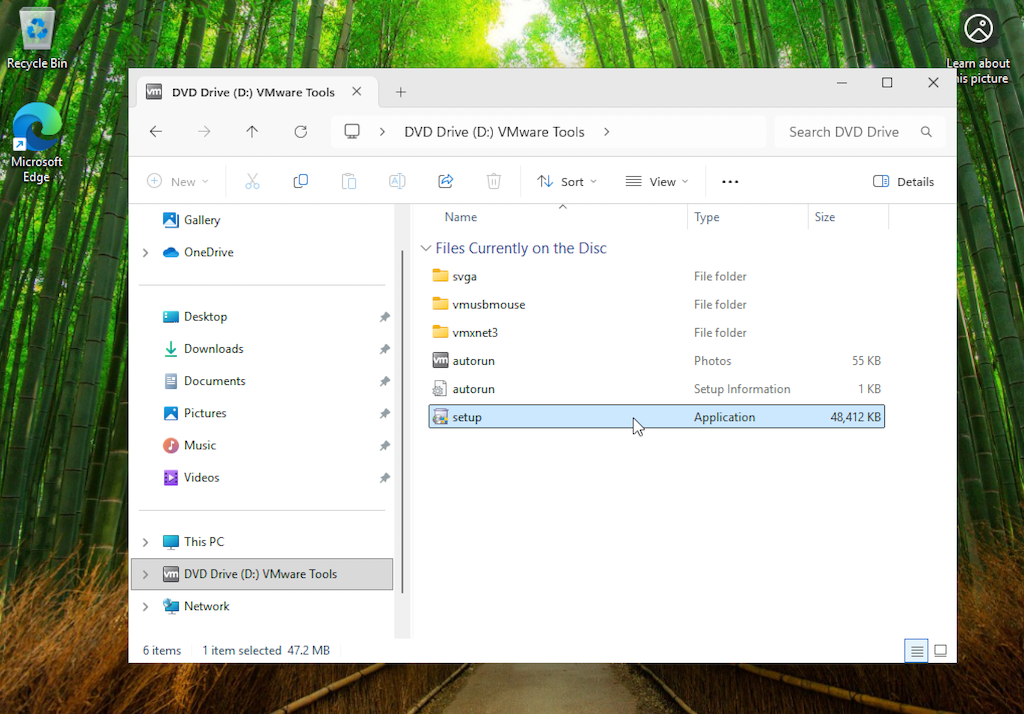
- Open File Explorer and go to the "DVD Drive (D:) VMWare Tools" directory then launch "setup.exe".
- Follow the prompts to do a "Typical" install and when it's completed restart your VM.
Once your VM has restarted click on "Virtual Machine" - "Settings" - "Network Adaptor" - "Share with my PC/Mac" and then restart your Windows VM one last time. Once it restarts you will have Internet connection for the VM as per usual if your host machine is connected to the Internet. Update the OS and take a snapshot. I like to keep my Windows VMs diconnected from the Internet when I'm testing shit out and only give the VM an Internet connection when I want to update the OS using a hacked Wifi or open network to do so. I always take a snapshot of the OS when it's updated so I keep everything up to date. You do you.
Obtaining legitimate Product Keys for Windows
People struggle for many reasons when it comes to finding legitimate pirated copies of Windows so they can install and run Windows in a VM. The number one reason people struggle with getting a legitimate copy of Windows is that most people don't want to pay for anything AND Microsoft has made it pretty difficult for the average paranoid individual to remain anonymous when installing it for the first time. You now require a Microsoft account with Internet connectivity in order to install Windows in a VM. There were ways around this but as time goes on by those methods have been fixed but I personally never had a problem with this so I'll share my method with you. If it worked for me it will work for you. Tell all your friends!
You want a legitimate copy of Windows that is updated to the newest version because when you're testing everything out you want the confidence that what you're doing actually works on the newest operating systems out there. Stay up to date because the people who you will be targeting in the near future will be using updated shit so get up to speed. Right? Whether you're trying the malware you just bought out or testing out your new found hacking skills you want to be using updated shit.
Here's what you need:
- Be capable of taking a picture with your cellphone.
- Not be retarded.
- Capable of using a keyboard.
- Internet connectivity *
- An anonymous email.
* Internet Connectivity must not be behind any type of Captive Portal or Login page when installing Windows in a VM for the first time. You must have a direct Internet connection once connected to a Wi-Fi Network. A good way to ensure this is when you're at that coffee shop or whatever and they have their Wi-Fi password posted somewhere to connect their Wi-Fi network this is a good sign. Open Wi-Fi networks like StarBucks usually will have some sort of Captive Portal associated to them for you to get Internet Connectivity. We don't want that. You understand?
Here's what I did and still do when I need a new copy of Windows.
There are computer stores all over the god damn place where I live and they sell variations of laptops, desktops, and other electronic equipment. Every person reading this should know a place right off the top of their head where they can go to a store to buy a new or used computer. Right? Anyways... head the fuck over there and find the version of Windows you're wanting to use IE: Home, Pro, etc. but I recommend on getting the Pro version so you have access to all the features of Windows.
Almost all of the time these computers are powered on and sitting there for anyone to test them out. If that specific store doesn't display their products powered on and easily available for you to acccess then leave that store and find a store that does.
Find the laptop with the version of Windows you want, launch Command Prompt, and enter this:
wmic path softwarelicensingservice get OA3xOriginalProductKey
OR
powershell -c "(Get-WmiObject -query 'select * from SoftwareLicensingService').Oa3xOriginalProductKey"
Once you've entered that command take a picture with your cell phone of the output which will be the Product Key, close the Command Prompt, and leave the store.
You now have the Product Key for legitimate copy of Windows. You can now install Windows in a VM without problems. This is great because we've obtained Windows anonymously and have nothing linking us to the "purchase" of it. Next, we want to use an anonymous email and Internet Connection to get Windows working in a VM.
Once you have a product key then you can download the appropriate ISO from Microsoft and load it up in VirtualBox or VMWare, go through the prompts to install it, and away you go. I will also point out that I would take a fresh snapshot once Windows is booted up and updated. I would only revert back to the original snapshot then update everything on an open or hacked Wi-Fi network and then re-take a snapshot that way everything I was testing out was on the newest updated version plus nothing was ever linked to me personally. And it's FREE.
If you've struggled with getting a proper copy of Windows this should change your life and if you're developing malware against the latest Windows OS then you want something not connected to you. This is good method. Specially if you travel you can walk into so many computer stores and obtain many Product Keys. Heck maybe even start a business of selling them online ;)
Ubuntu ISO
https://ubuntu.com/download/desktop
Download the latest Ubuntu ISO and install it in a VM.
Kali
https://www.kali.org/get-kali/#kali-virtual-machines
Download the latest Kali and install it in a VM.

"Kali Linux is a Debian-based Linux distribution aimed at advanced Penetration Testing and Security Auditing. Kali Linux contains several hundred tools which are geared towards various information security tasks, such as Penetration Testing, Security research, Computer Forensics and Reverse Engineering. Kali Linux is developed, funded and maintained by Offensive Security, a leading information security training company."
In other words this OS is designed for hacking and has many of the hacking tools needed to be a successful cybercriminal and hacker.
Make sure you select VirtualBox so we're all on the same page. If you choose to try the other programs do so on your own!

Regardless of your OPSec or how you choose to operate everything will come down to one thing.
The USB.
Remmeber, when I say USB from now on I'm referring to:
- USB
- SD Card
- MicroSD Card
- Any form of digital storage
If you've encrypted your USB and you're storing a Whonix VM along with everything else on it then that USB will most likely be in your possession when the cyber S.W.A.T team comes crashing through your window and arrests you.
If you've put Tails onto USB with persistence enabled then that USB will most likely be in your possession when the cyber S.W.A.T team comes crashing through your window and arrests you.
Right?
The result will be the same.
If something goes fucking crazy and you revealed your true IP to the authorities that USB you have with everything on it will be your down fall. Did you encrypt it properly? Did you use a strong password so your passwords cannot be cracked by the feds? Can anyone tell if the USB is encrypted or if Tails has an encrypted persistent folder on it? Yes, yes they can.
The Weaknesses
OK let's say shit has hit the fan and you're arrested. It doesn't matter how you got arrested the point is your arrested and the police have your computers along with all your USBs, HD, microSD cards, and basically anything capable of storing data will be confiscated.
Assume worst case scenario of the police having your USBs that are encrypted with your shady ass cybercriminal plans saved on it.
Police will be able to determine:
A) That your hard drive (HD) is encrypted and demand the passphrase to unlock it.
B) See that you have an encrypted folder on your HD and demand the passphrase to unlock it.
C) See that your USBs that are encrypted and demand the passphrase to unlock it.
D) Determine Tails is installed on a USB and see an encrypted persistent folder on it then demand the passphrase to unlock it.
E) Have all your shit.
Computer forensics would reveal there is an encrypted USB so there's no hiding from that.
The Tails OS website states:
"The encrypted persistent storage is not hidden. An attacker in possession of the USB stick can know whether it has an encrypted persistent storage. Take into consideration that you can be forced or tricked to give out its passphrase.".
We already know that right? When you booted Tails up for the first time there was no option to enter a password for the encrypted persistent folder was there? There was an option to turn on the encrypted persistence and on your next reboot it now asks for your password to unlock the encrypted persistent folder. It doesn't take a rocket scientist to figure out you have an encrypted folder there since anyone could plug that USB into their computer to boot into the Tails welcome screen and see it. If it asks for a password then there is an encrypted folder present and if it only gives you an option to Turn ON the persistent folder then there isn't. Wow great detective work guys.
We now know that whether you're running Tails with persistence installed on a USB or you're encrypting everything on a USB (Whonix, passwords, plans, etc.) will present the same problem in the end. Whether you choose Whonix or Tails both methods of operating would show there are encrypted containers on the HD or USB through computer forensics.
The police would demand the passphrases to open it which would seal your fate or you choose not to reveal your passwords and be charged accordingly in your country. Charges for not revealing your passwords vary from country to country and now might be a good time to look that up where you live :)
If you're booting directly from USB (Tails, Kali, etc.) then only (1) exploit would be enough to leak your IP and compromise you. Did you download a copy of Tails, Whonix, etc. that has been compromised? Is this really out of the reality of possibilities?!
Exploits are getting more hard to come by and are of high monetary value available for purchase so you best be worth it.
If you're using Whonix then in order for you to be compromised or have your IP leaked means that an exploit would be needed for Whonix, Tor Browser, then VirtualBox, then possibly another exploit for Windows, macOS, or whatever OS you're using. In today's day and age exploits of that nature are noticed almost immediately with cyber security researchers being all over that shit.
Using Whonix requires multiple exploits needed to compromise you and your computer.
Just that alone gives you more and more barriers when using Whonix. Still, you will leave some sort of a digital trail on your Windows or macOS host computer.
For example, you have VirtualBox installed on your Windows or macOS computer which stores the history on the latest used VMs which points exactly to where you store that VM. Meaning, if they got onto your computer they would be able to see your launching a VM that is saved on a USB and they need to find that USB. You see?
Even if you think you're cleaning all your digital tracks left behind when using a Windows or macOS computer the reality is there's so much you don't realize you're leaving behind and you should be mindful of this.
Whereas if you're booting Tails off a USB into memory nothing ever touches your HD so there is nothing on your computer that would be left behind. Tails wipes the memory before each shutdown ensuring that when you bootup Tails again it's fresh with nothing left behind.
Only (1) exploit would be required to reveal your IP and location when using Tails. You wouldn't even know it happened when you're using it. That goes for any OS really as we'll get into soon. Tails and Whonix are appealing since both make it idiot proof with the ease of installing it onto a USB and being able to conceal small objects easily (USBs).
So which method do you pick? Harden your OS and run Whonix in a VM, Tails in a VM, or are you booting Tails from USB?
If you decide you want to use multiple different Operating Systems (not Tails) then you can boot into them using one USB.
When you take the next course ACT I - Wi-Fi Hacking you'll learn how to compromise the Wi-Fi networks around you so you can use other people's Internet to conceal yourself even more. If on that dark day you get compromised and reveal your true location it sure as fuck won't be yours. Once you know how to hack Wi-Fi networks using Whonix or Tails is a personal choice.
Think everything over before committing one way or the other and way your pros and cons. It's a good idea to try both Whonix and Tails to see which one you prefer but regardless you need to pick one or the other.